August 2022
Once logged into Canopy, you can navigate to a new site containing detailed product documentation at: https://docs.canopyco.io.
What’s covered today:
- Command line keyword search
- Background on how the data is indexed
- Release notes
docs.canopyco.io
You must be logged into Canopy to access the documentation.
You can now click on the “Document ID” in the Detailed Entity View and go directly to the Document View. You can also click on the document icon and copy the Document ID to your clipboard.
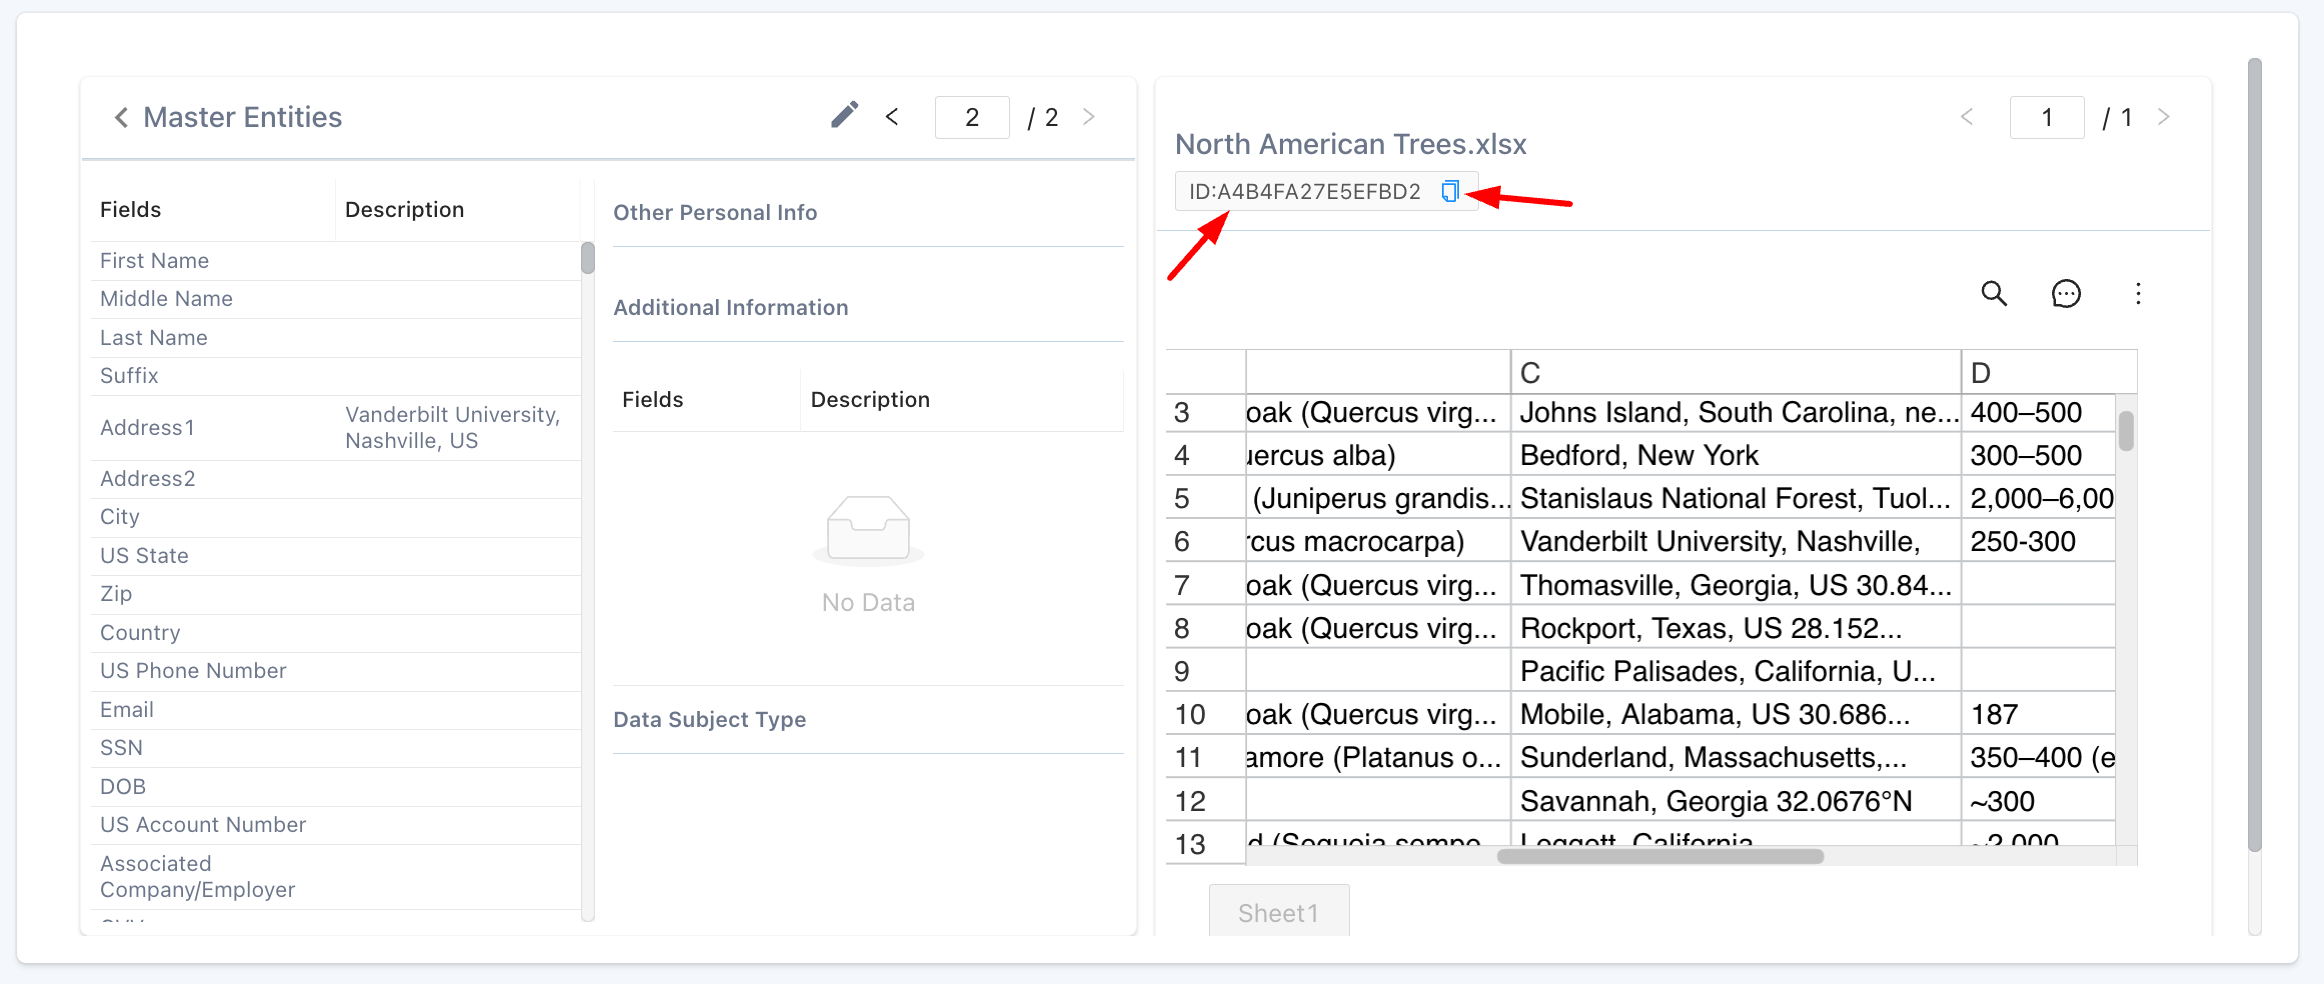
Hotlink to Document
Your team will now get an error message if they try to enter more than 1000 characters into an Entity Field. The character length validation occurs anywhere in the application where your team can enter an entity.
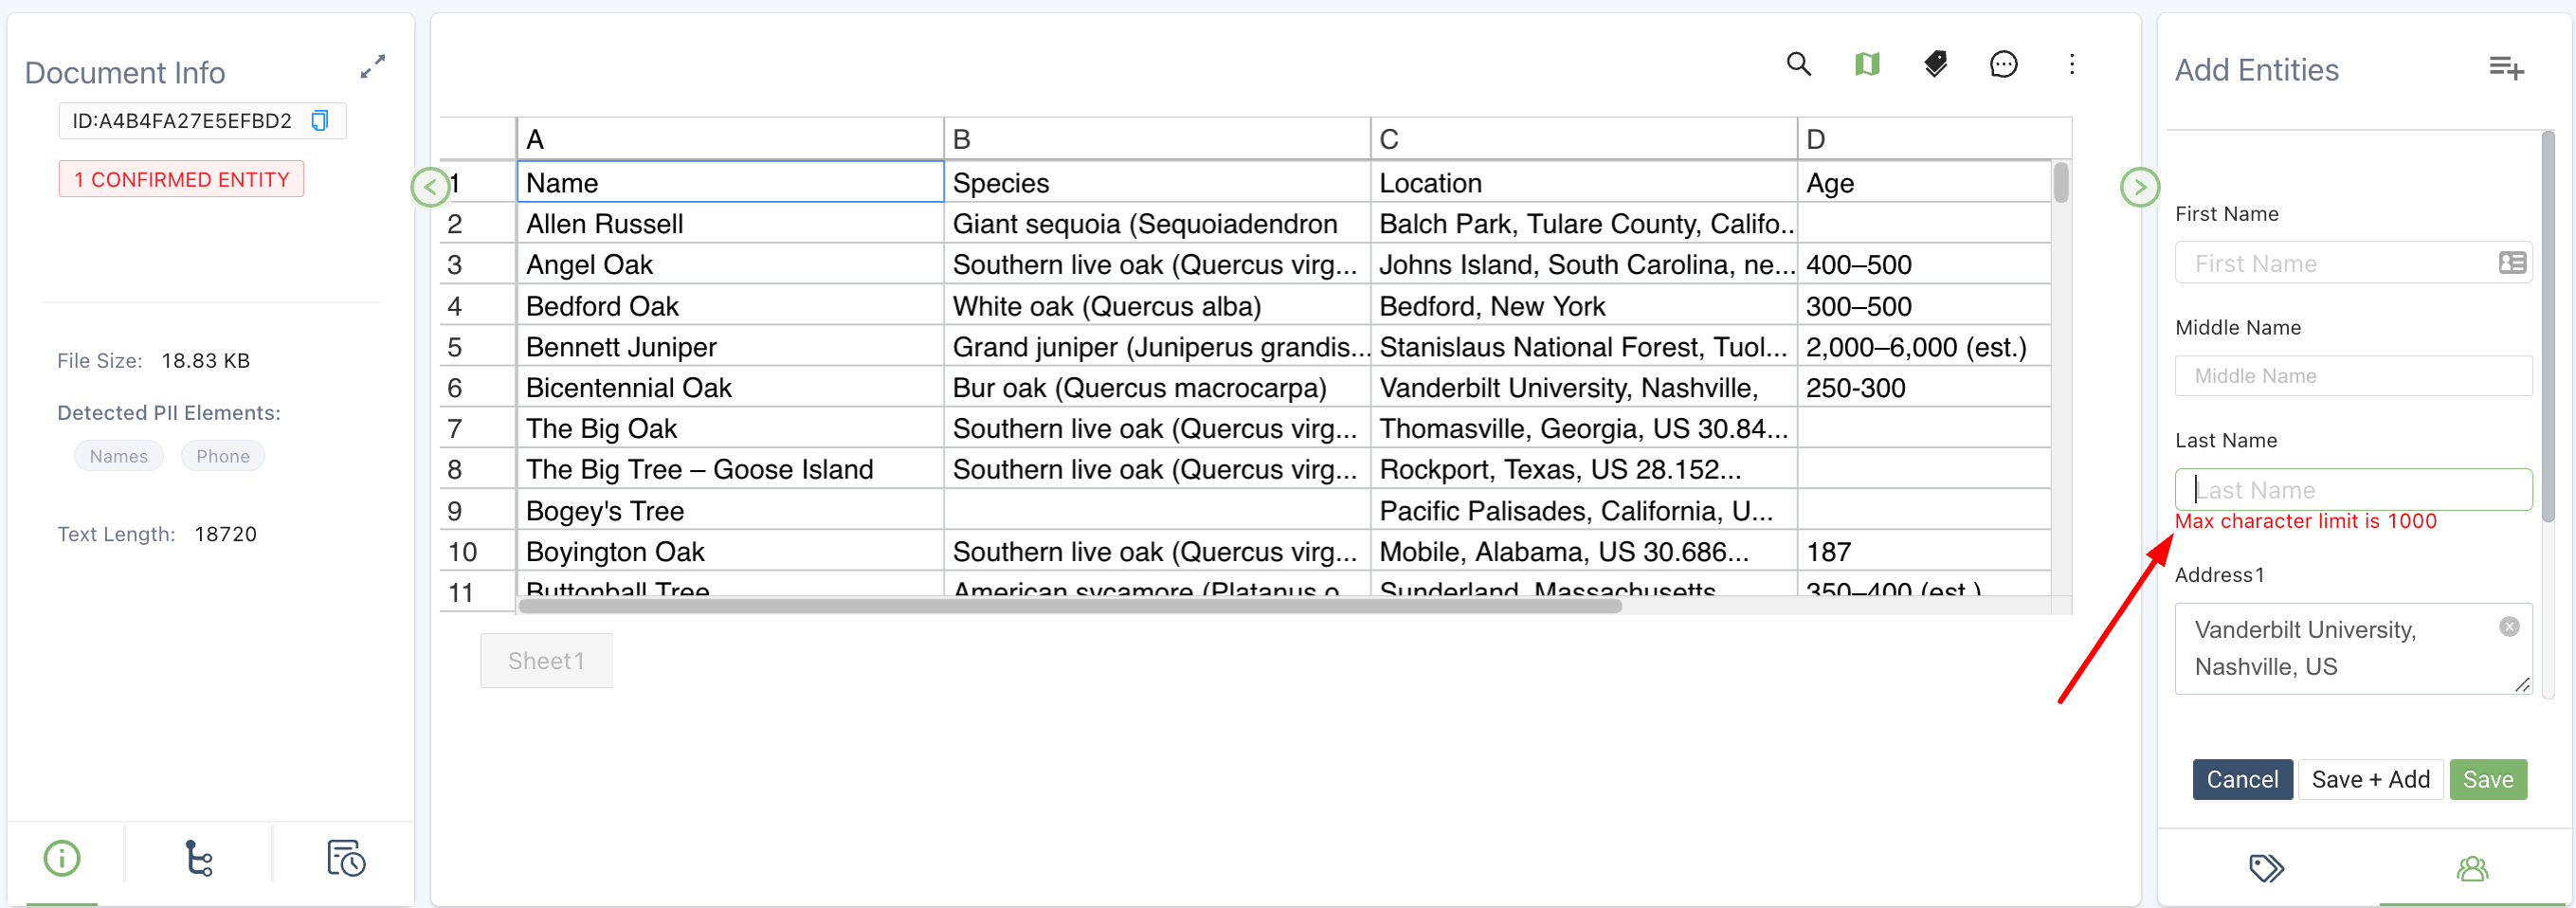
Example character limit exceeded error message
Your team can now add a sortable text length filter in the Document List View.
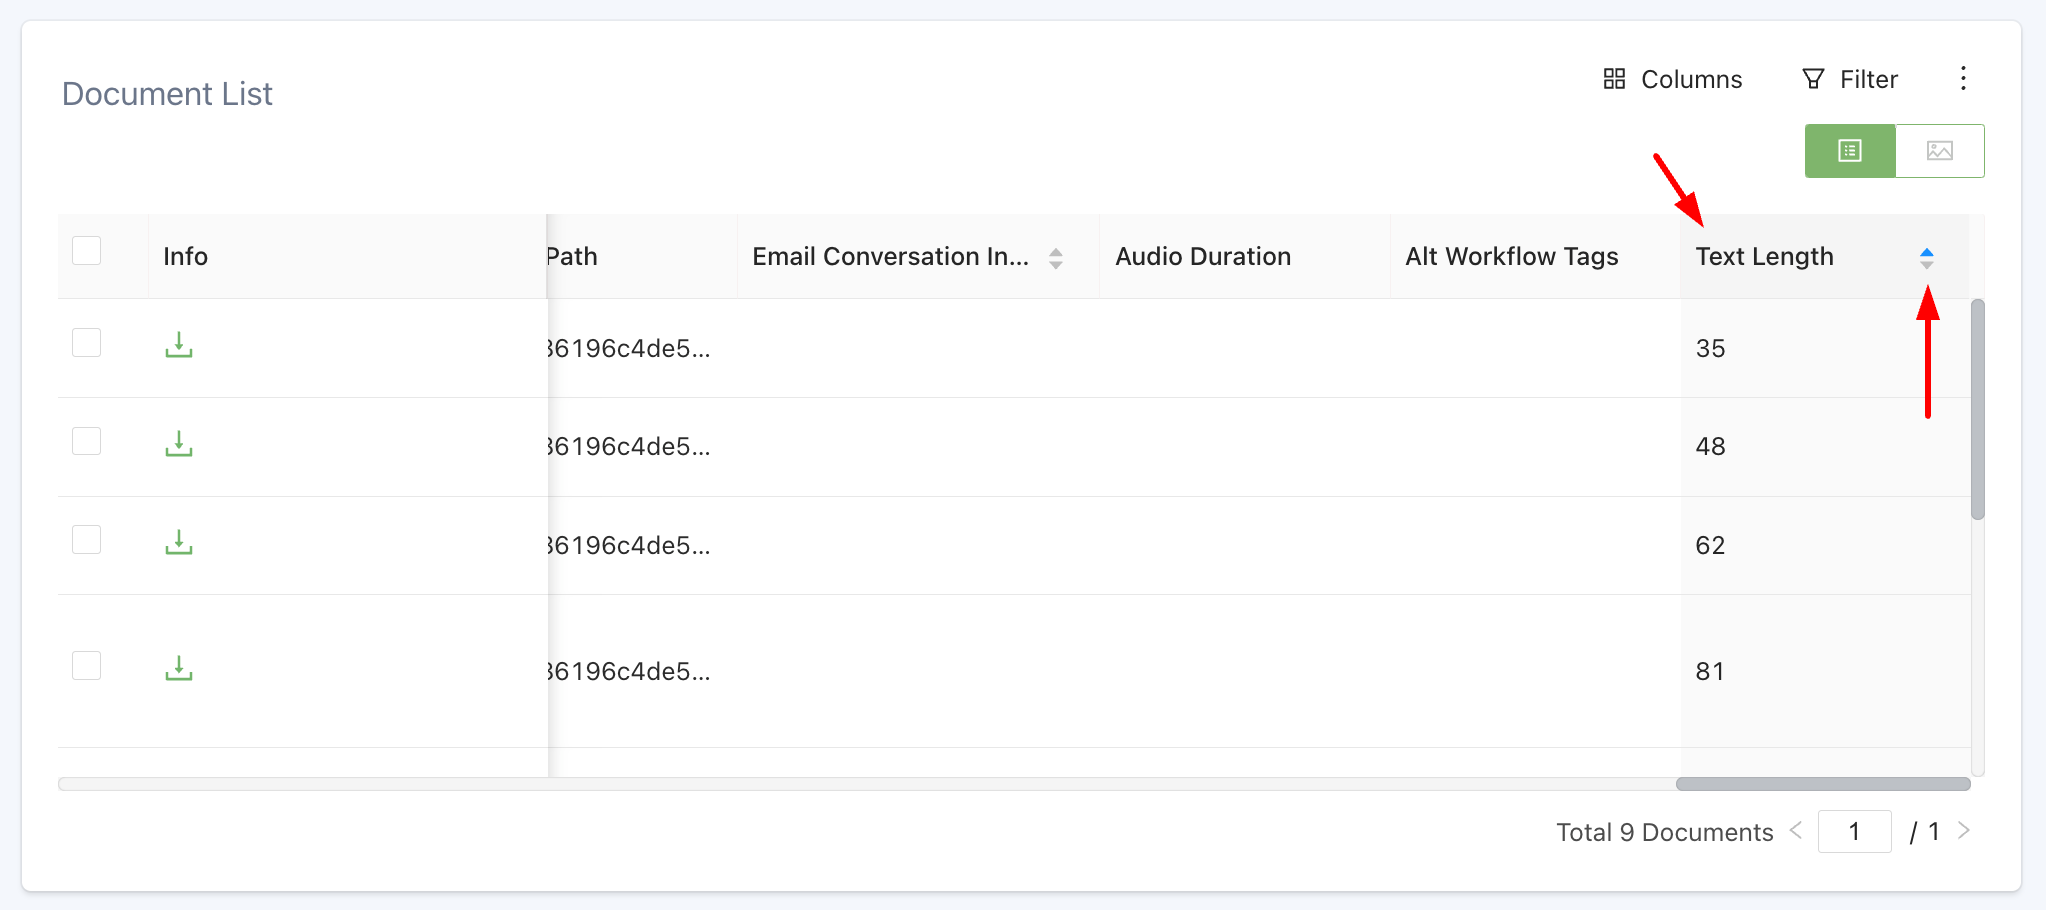
Text length in Document List View
From Document View, your team can see the text length in the Document Info tab.
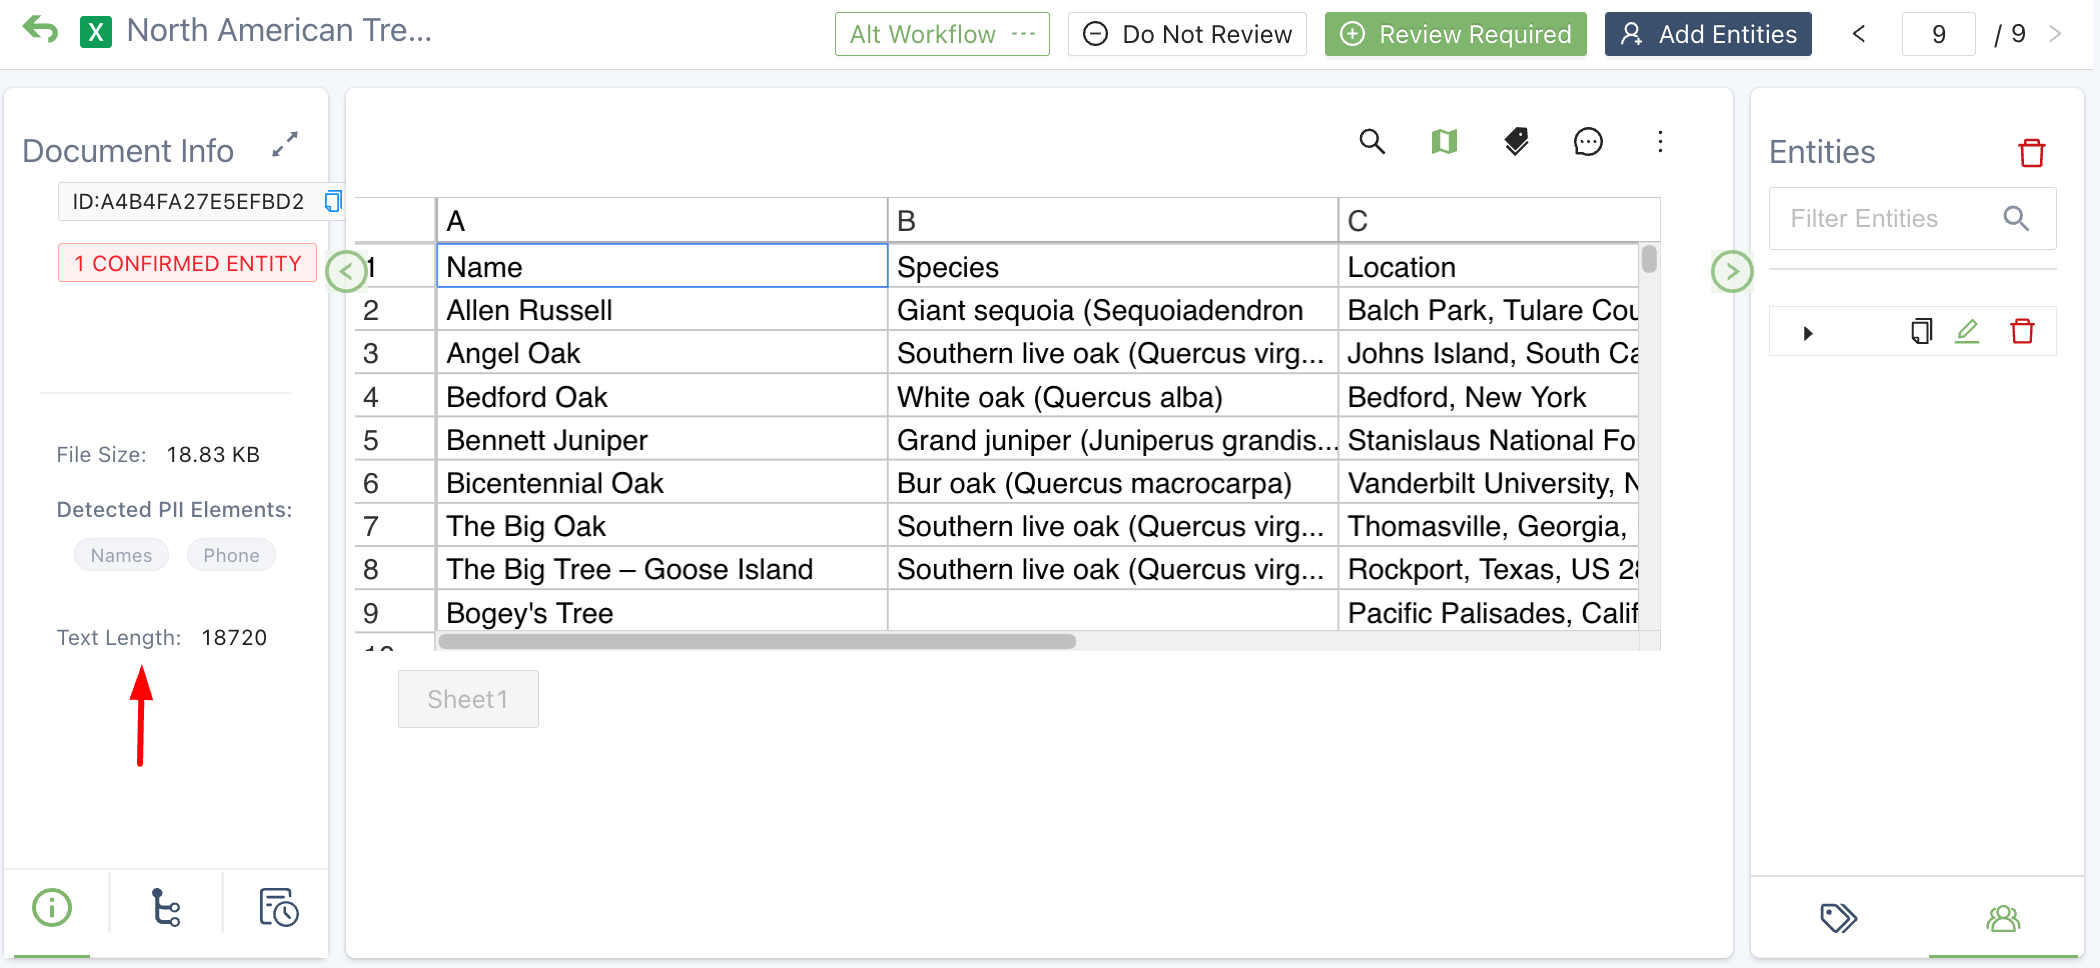
Text length in Document View
This field is only available for new projects.
Now your team can enter multiple detected elements, separated by a semicolon, to a single multi-line field (ie, medications, icd10, diagnosis, etc) by simply clicking and adding.
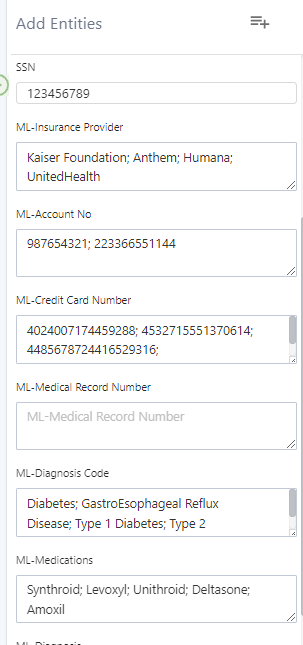
Example custom fields with multiple entries
Now you can request for the source path of a document to be added to your metadata and Raw Entity List exports. This path shows every file encountered in the extraction process; from the upload file, to the final processed file. This path includes:
- File system folders
- Container files
- Archive files
- Upload file
Creation of source path requires your team to open a ticket with customer support.
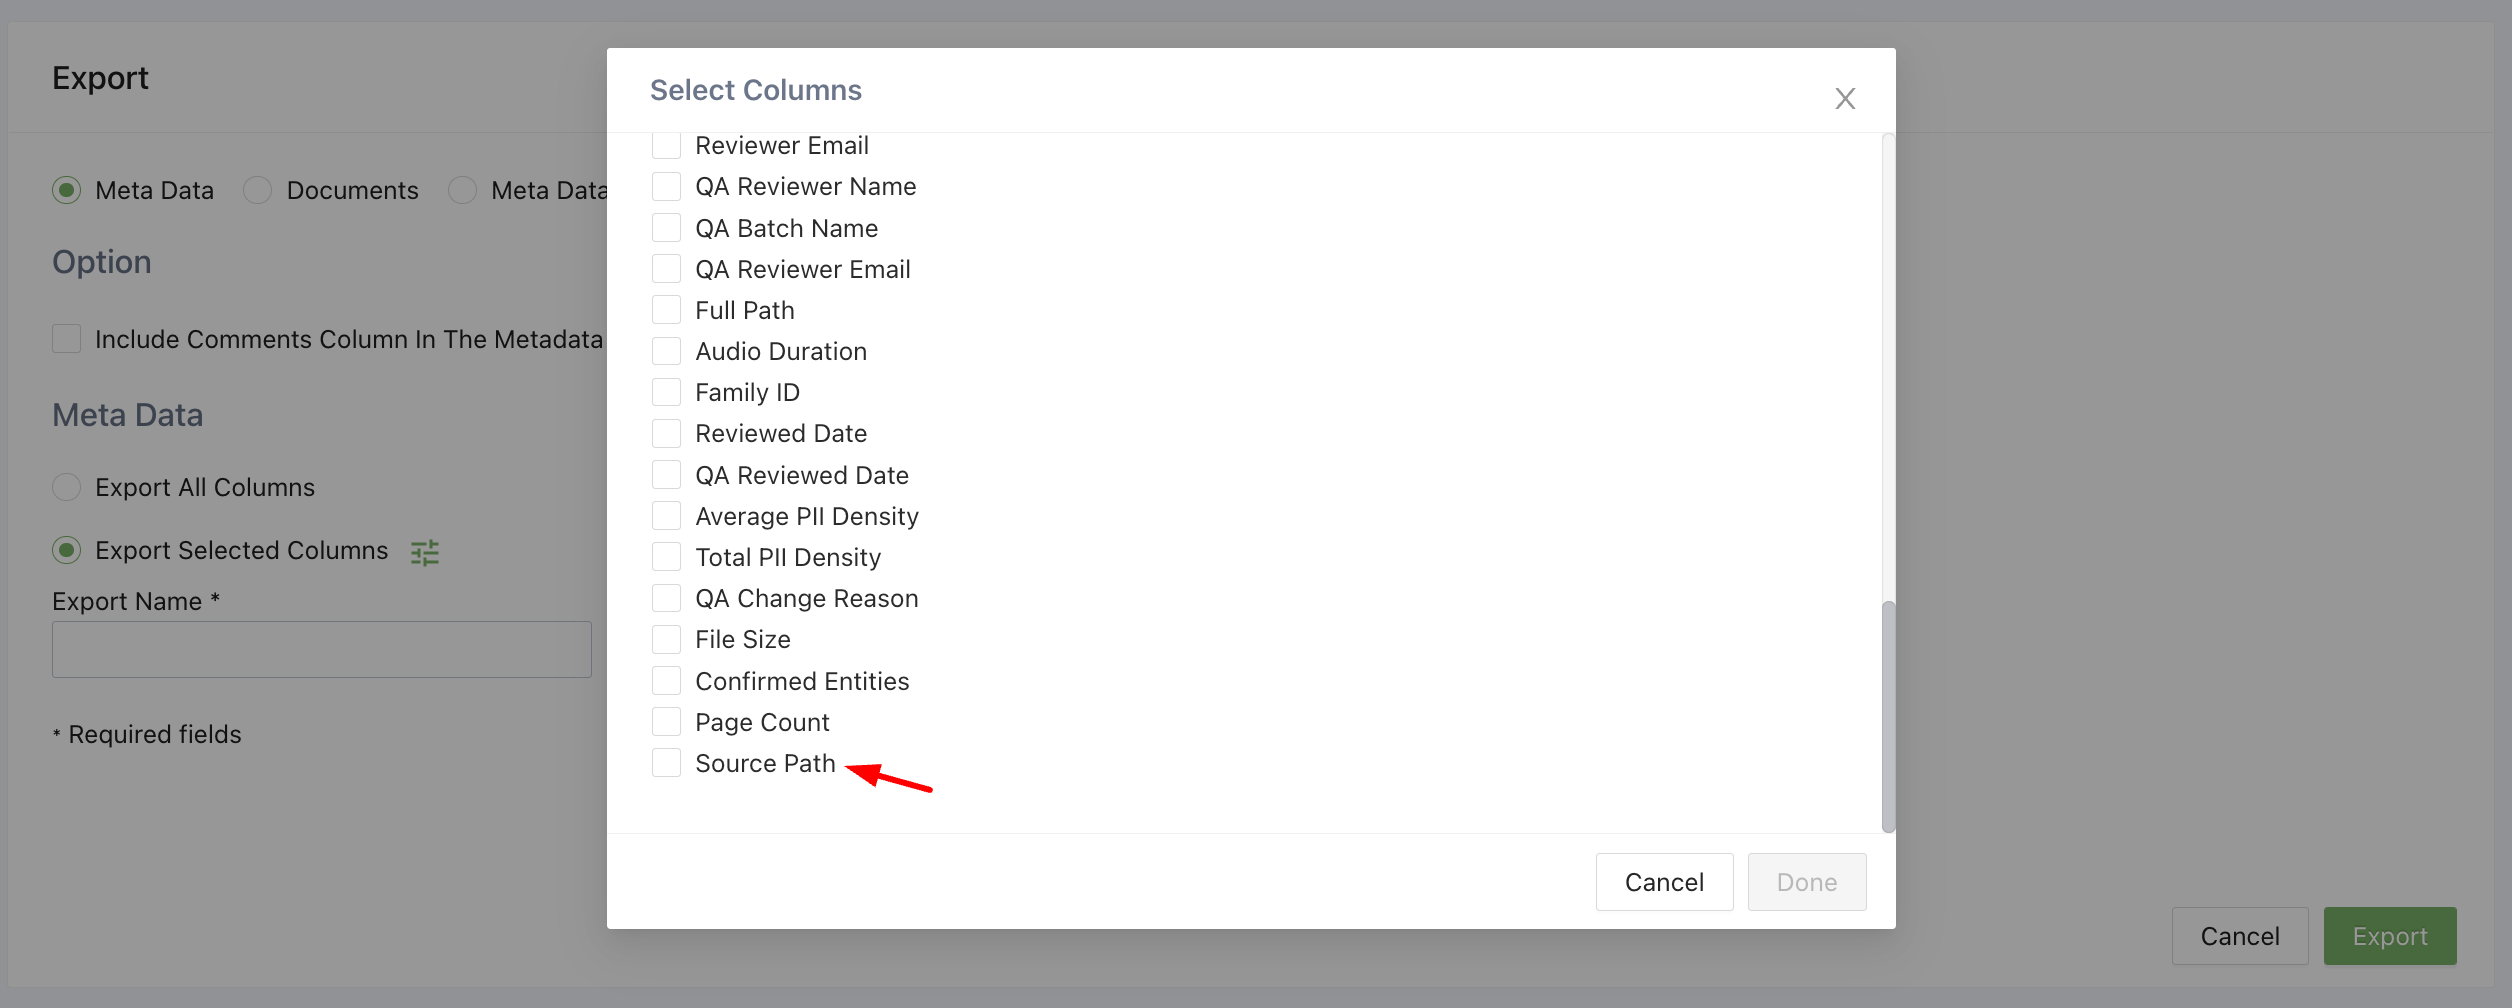
Export source path metadata
Now there is a filter designed specifically for presentations where Canopy detects mappable tables.
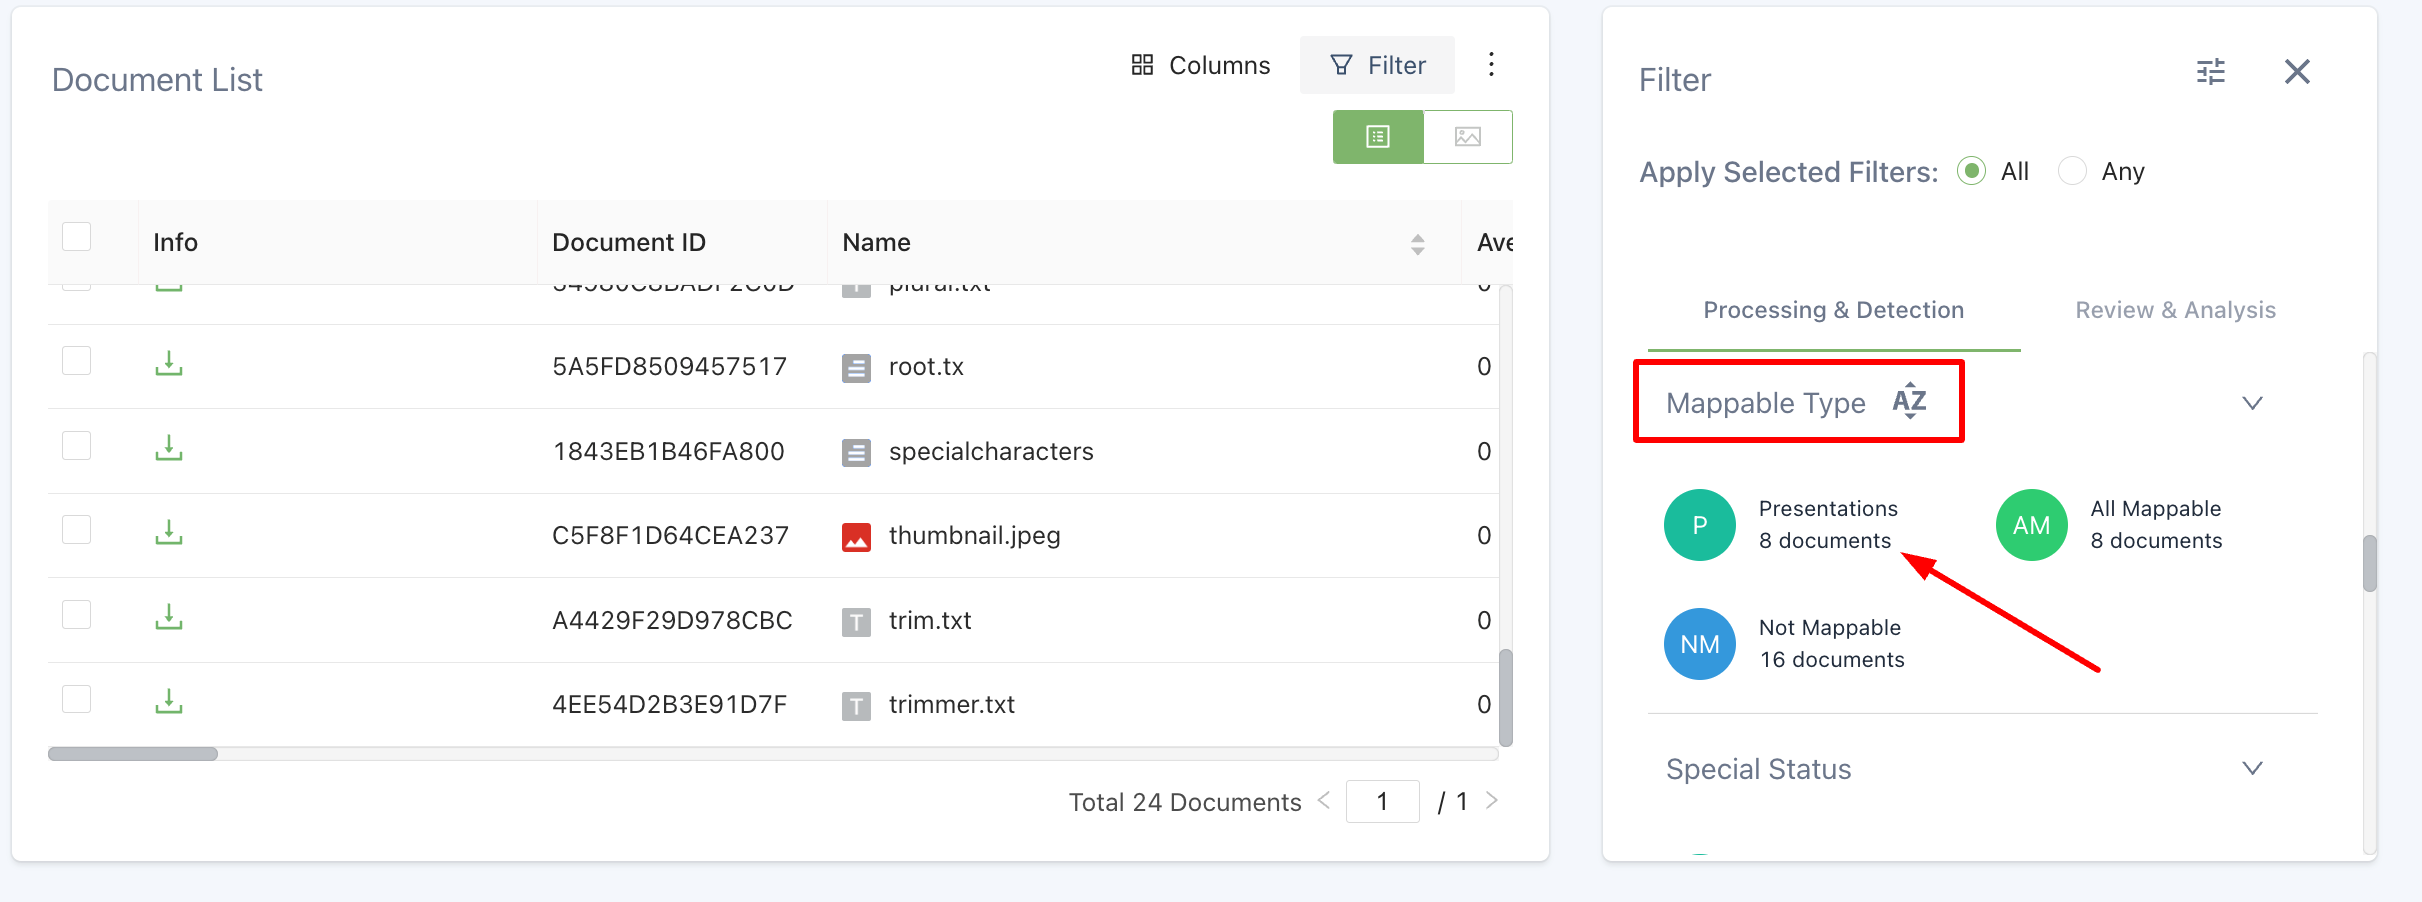
Mappable presentation filter
The mappable presentation filter is only available for new projects.
When viewing spreadsheets you can search on a keyword phrase in a tab by clicking on the magnifying glass.
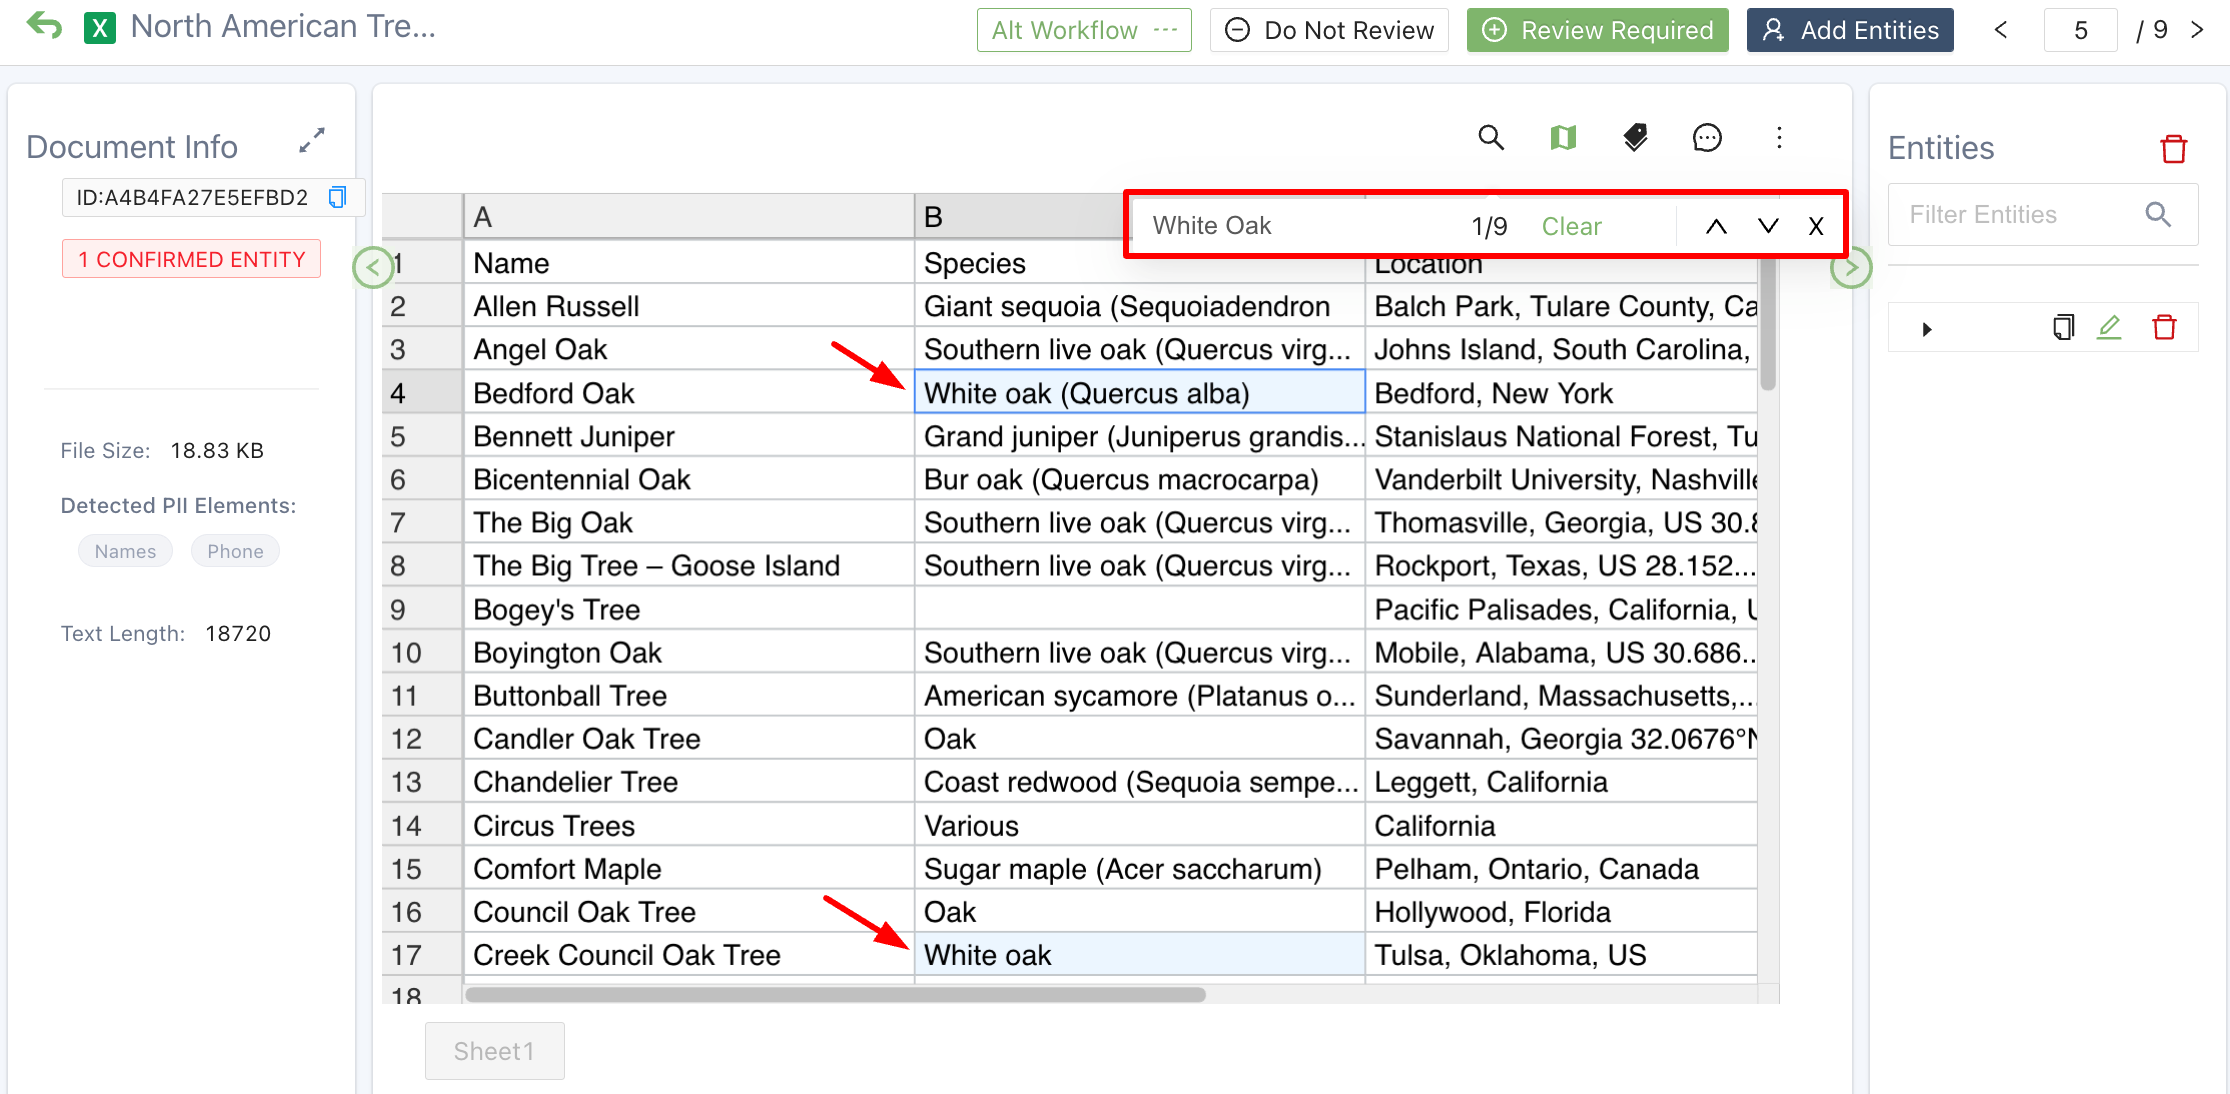
Search within a spreadsheet tab
This search is not case-sensitive.
We’ve clarified the communication thread selection for batching documents.
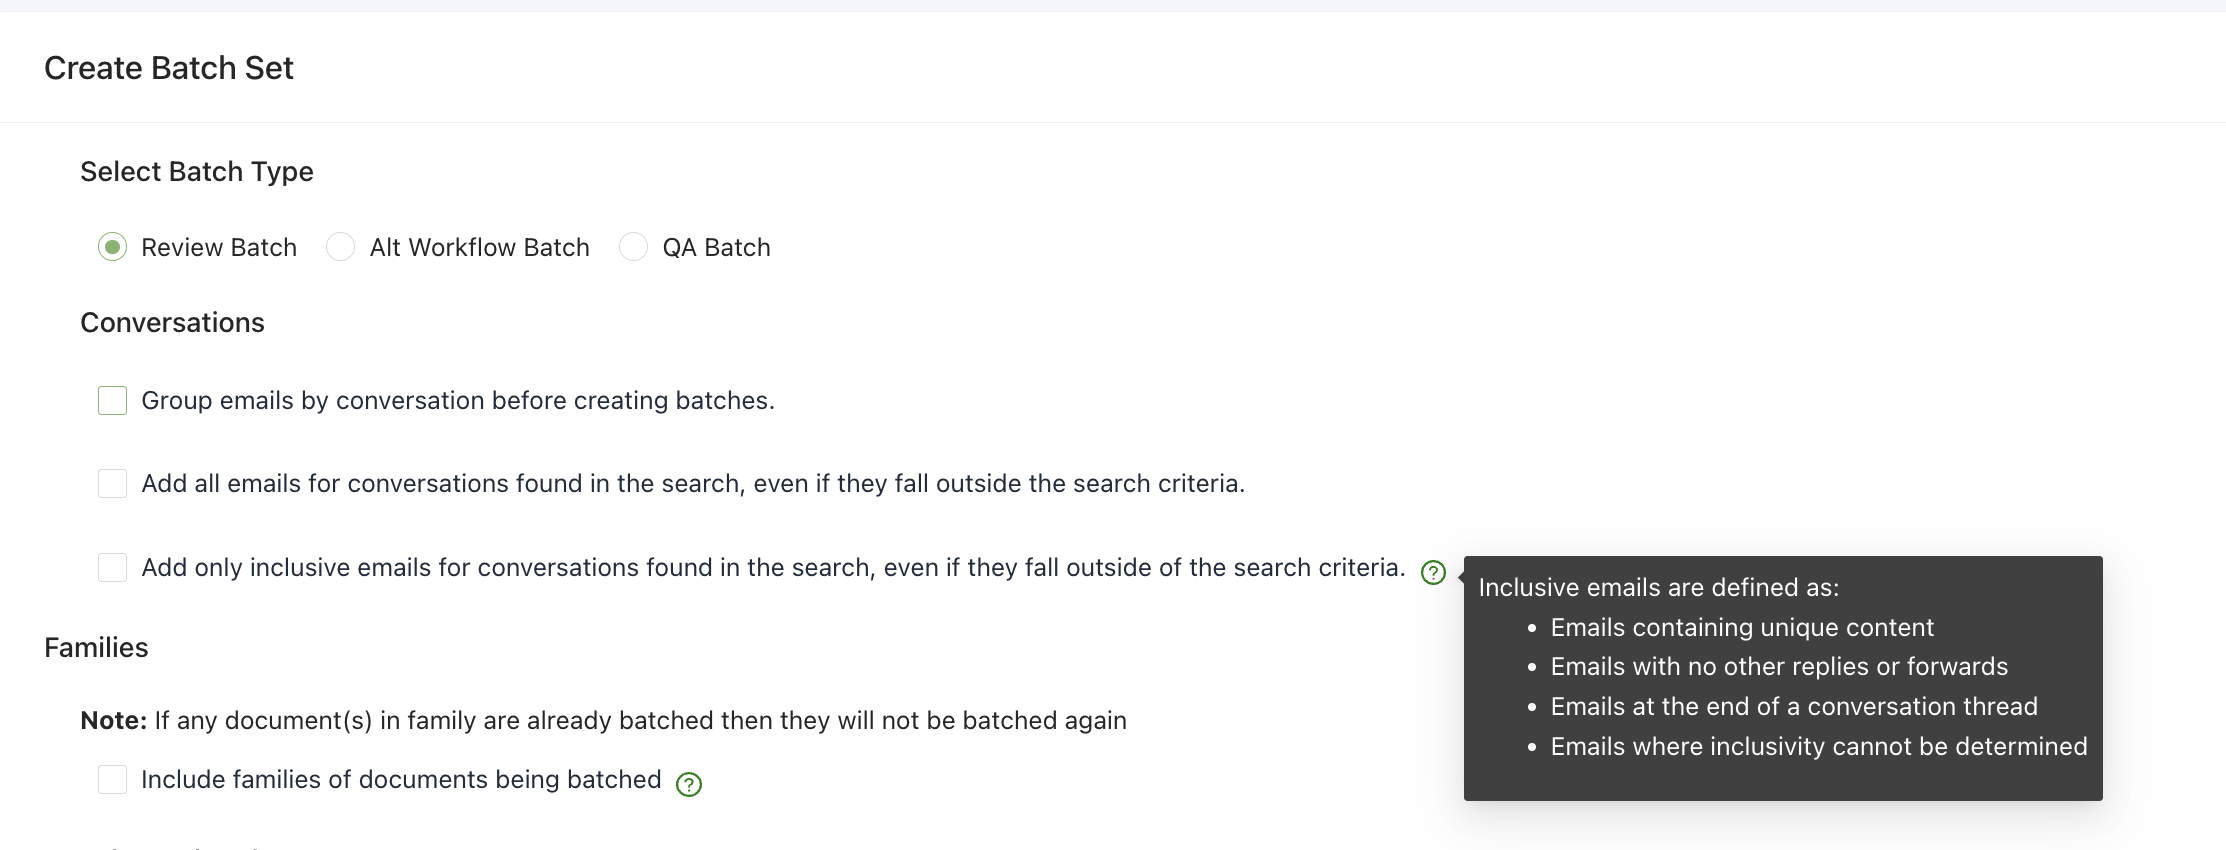
Conversation batching options
We’ve added a warning, and an additional user confirmation before permanently turning off the batching workflow.
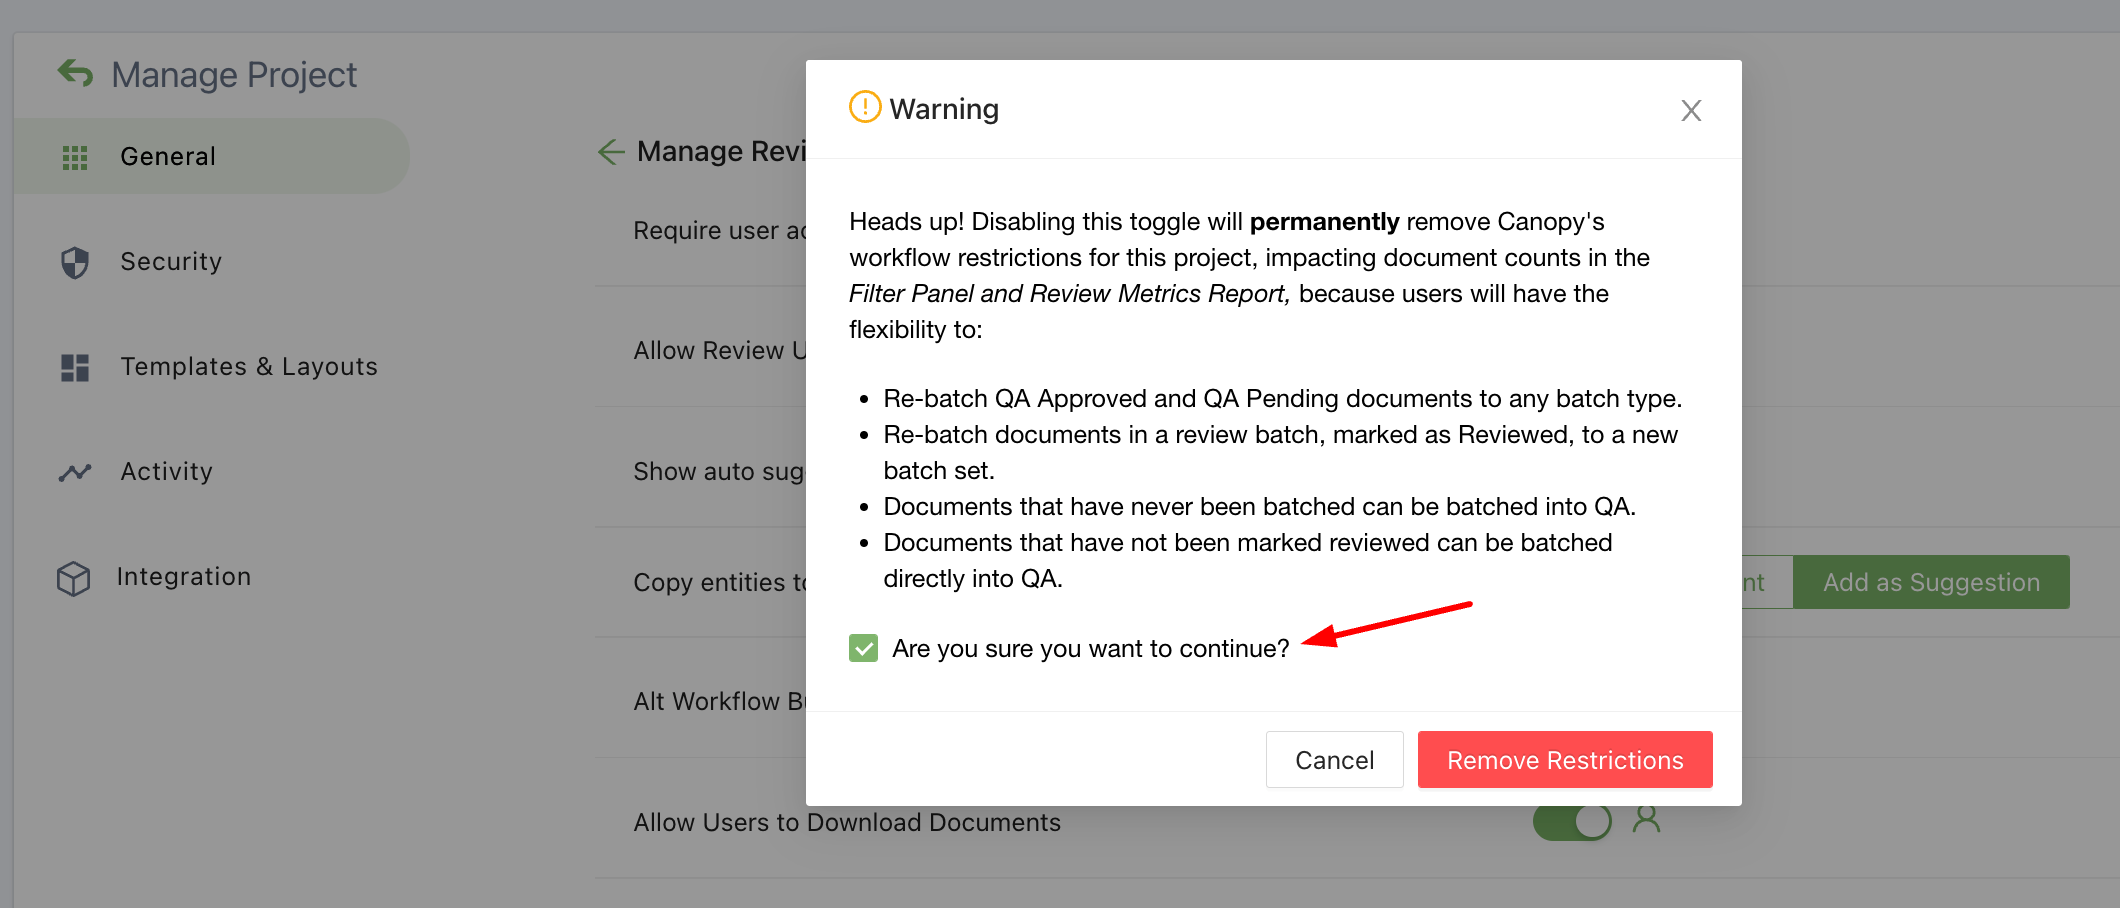
Disabling batch rules warning
Entities added via entity propagation will have a flag indicating how they added.

Example Entity Propagation Tag
For non-flattened image PDFs, we now extract the embedded objects and maintain the parent-child relationships. For example, parent-child relationship should show in the family tree like this:
- Original PDF
- Embedded PDF1
- Embedded PDF2
- Image (if the image is the correct size for processing) Each extracted file will be maintained as a separate document (as we would with an email and attachment).
Extracted embedded images will be classified, viewable, and filterable in the image gallery.
If the PDF is a scanned image or if the images are not embedded objects, the images are viewable as part of the PDF. This means that the image is neither run through the image classifier nor viewable in the image gallery.
If the container file you upload fails to process, your team now has the option to upload a replacement container file. Repair the file and re-upload, don’t worry the original file name will stay intact and the volume will adjust to the size of the replacement file.
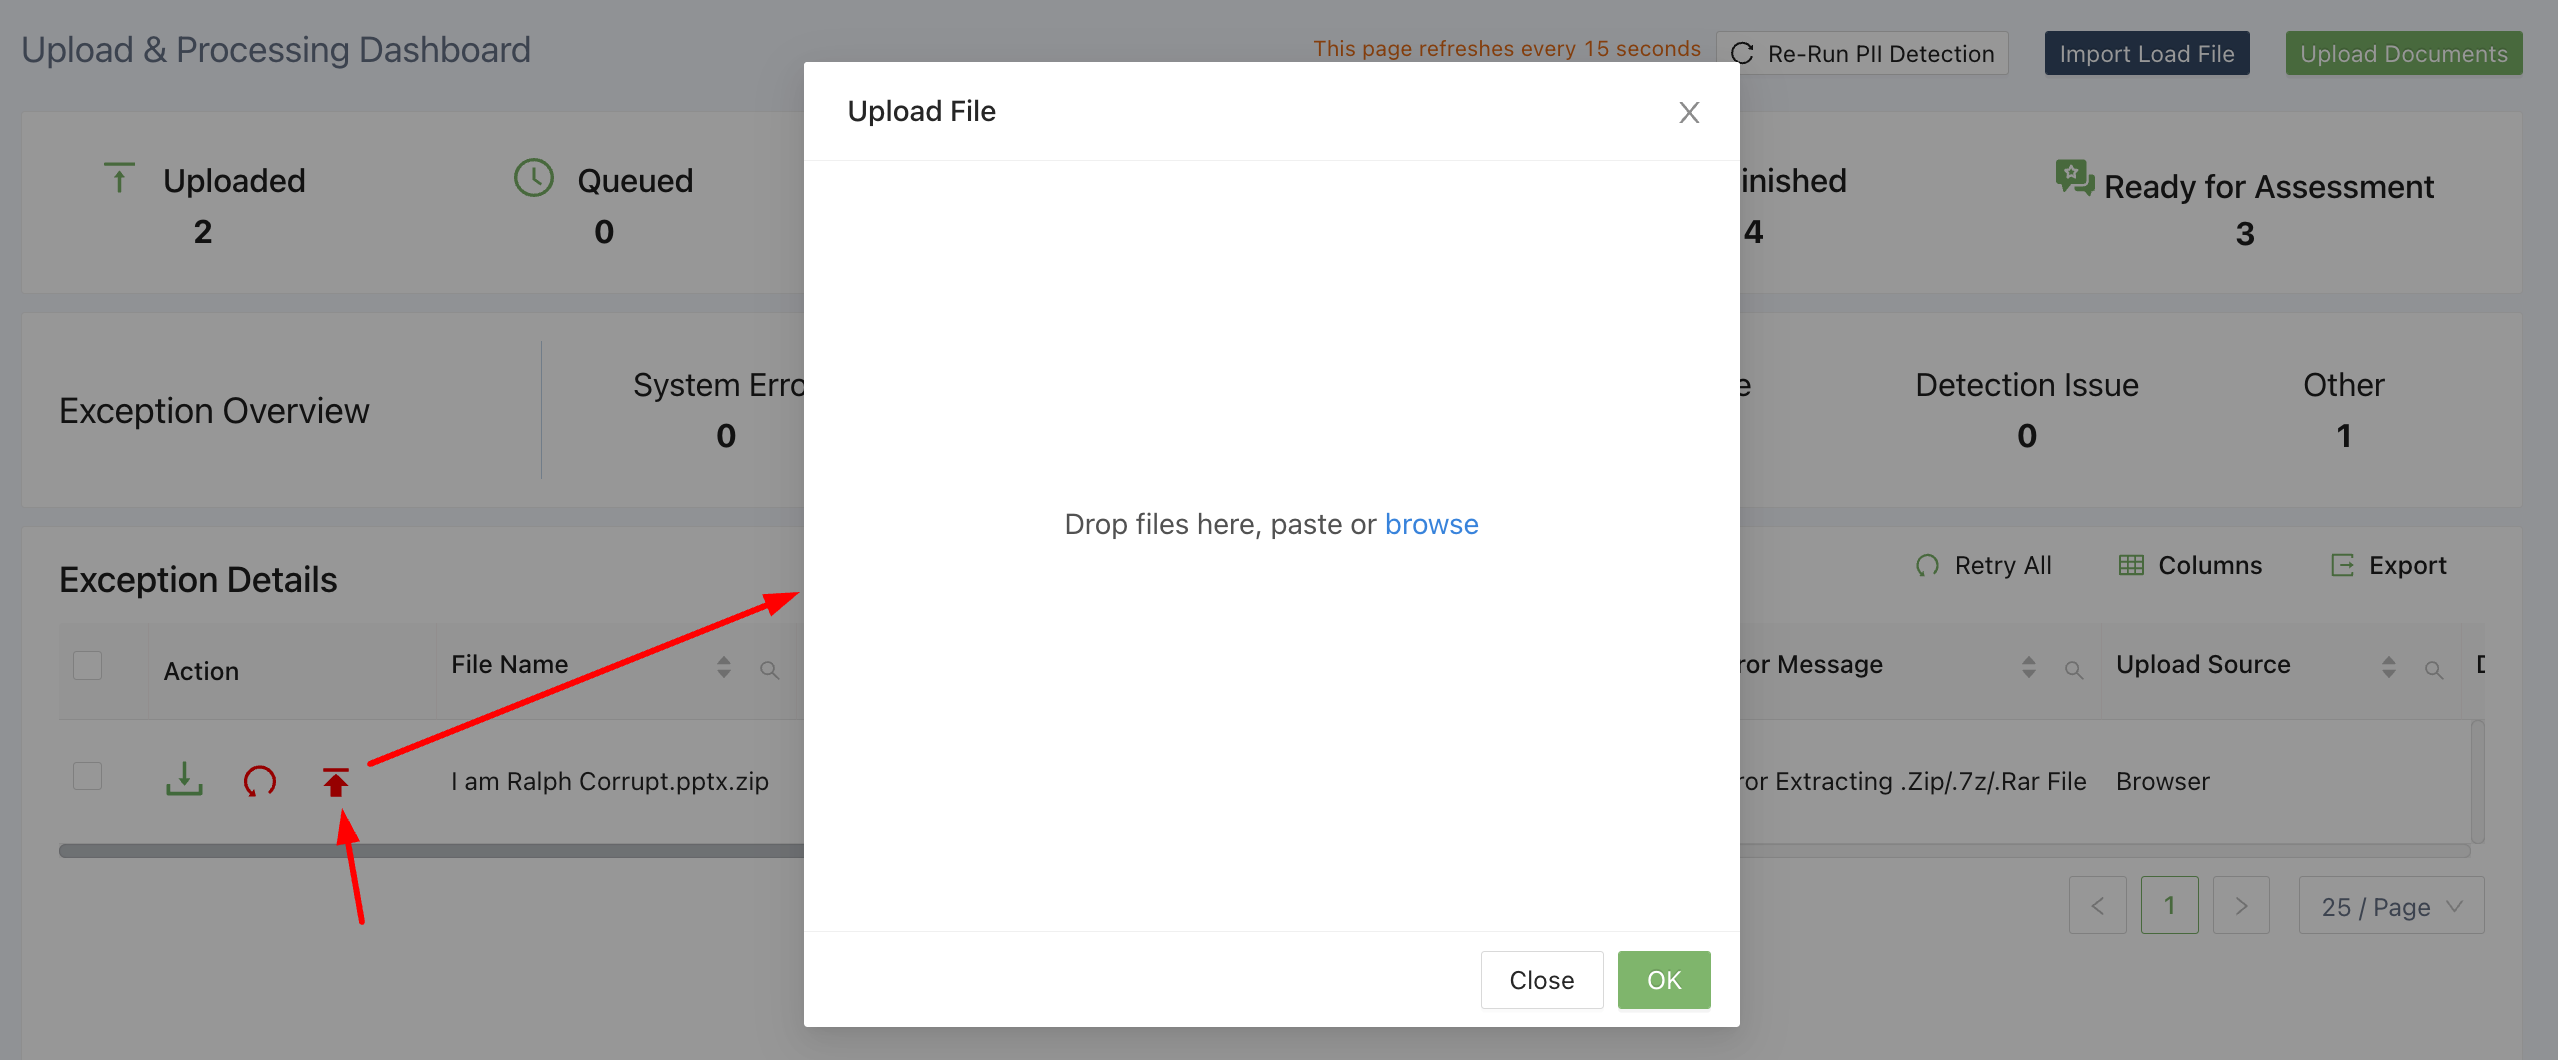
Re-upload transfer containers
When your team uploads a list of custom detection rules the application will validate the tag names against the list of system tags.
If a system tag with this exact name already exists, the app will highlight the rules that failed validation.

Duplicate system tag hover message
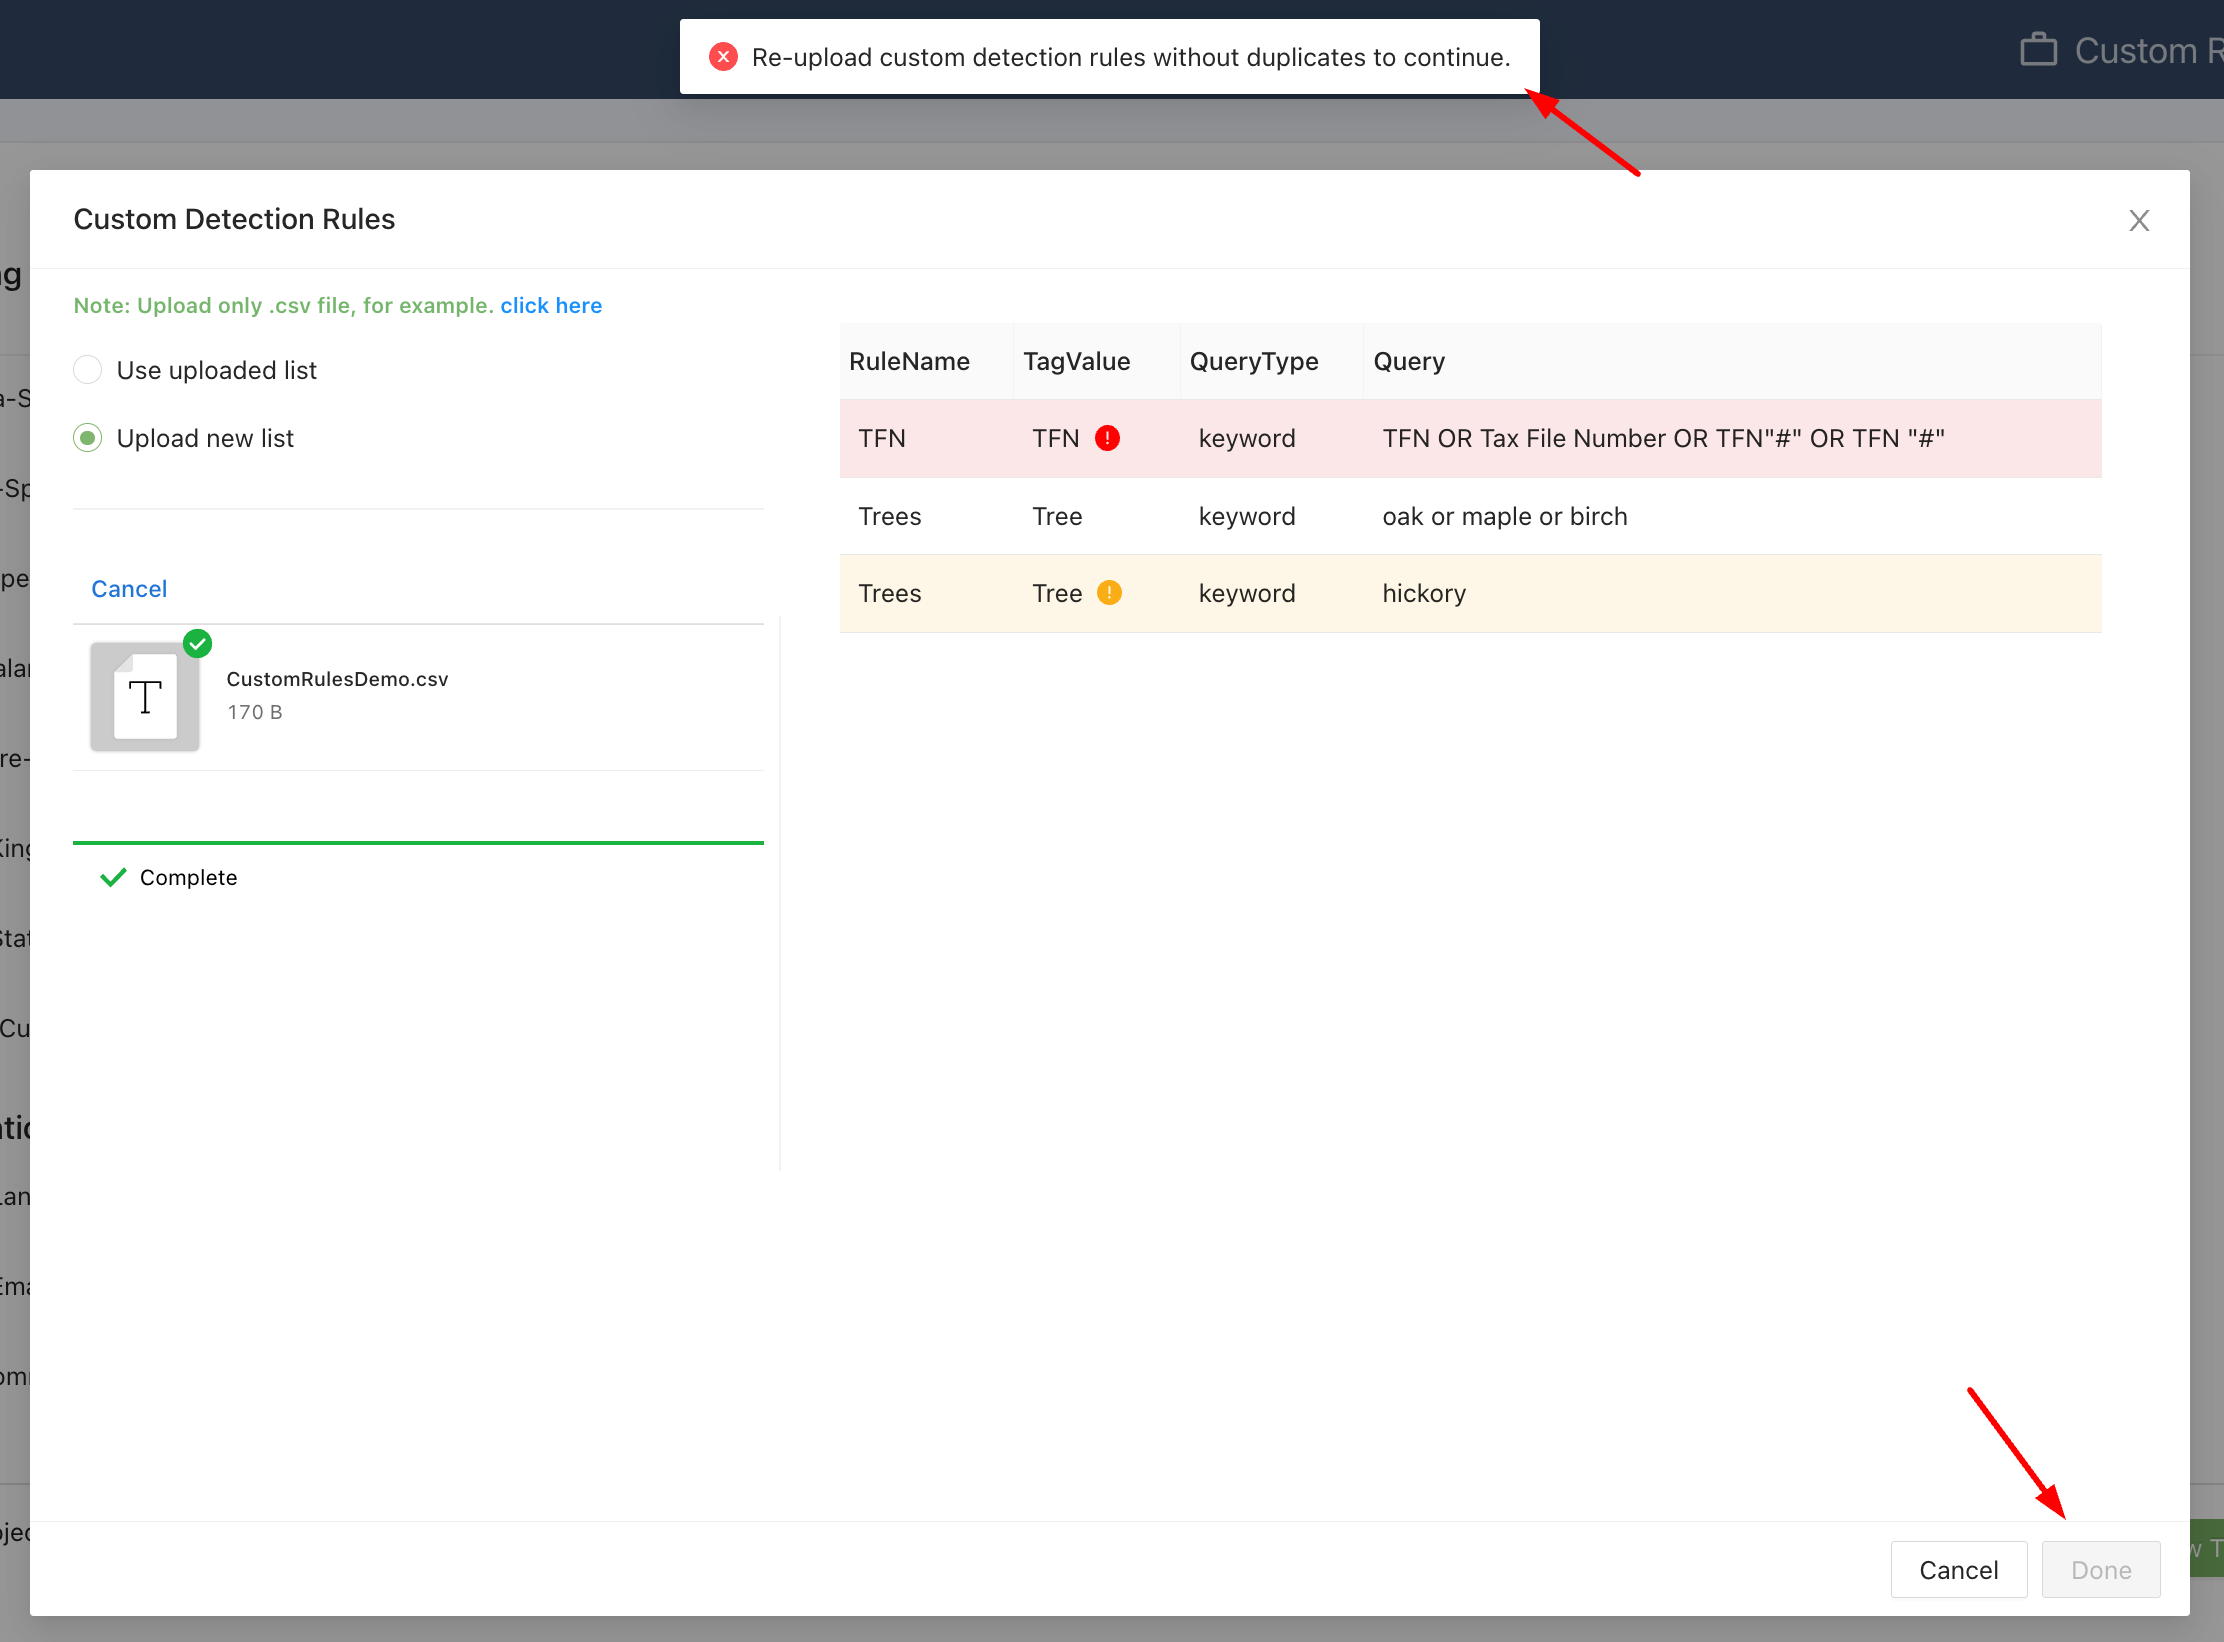
Duplicate system tag error message
If your team uses duplicate custom rules, the combined rules will act as if they were separated by OR operators.

Duplicate custom tag hover message
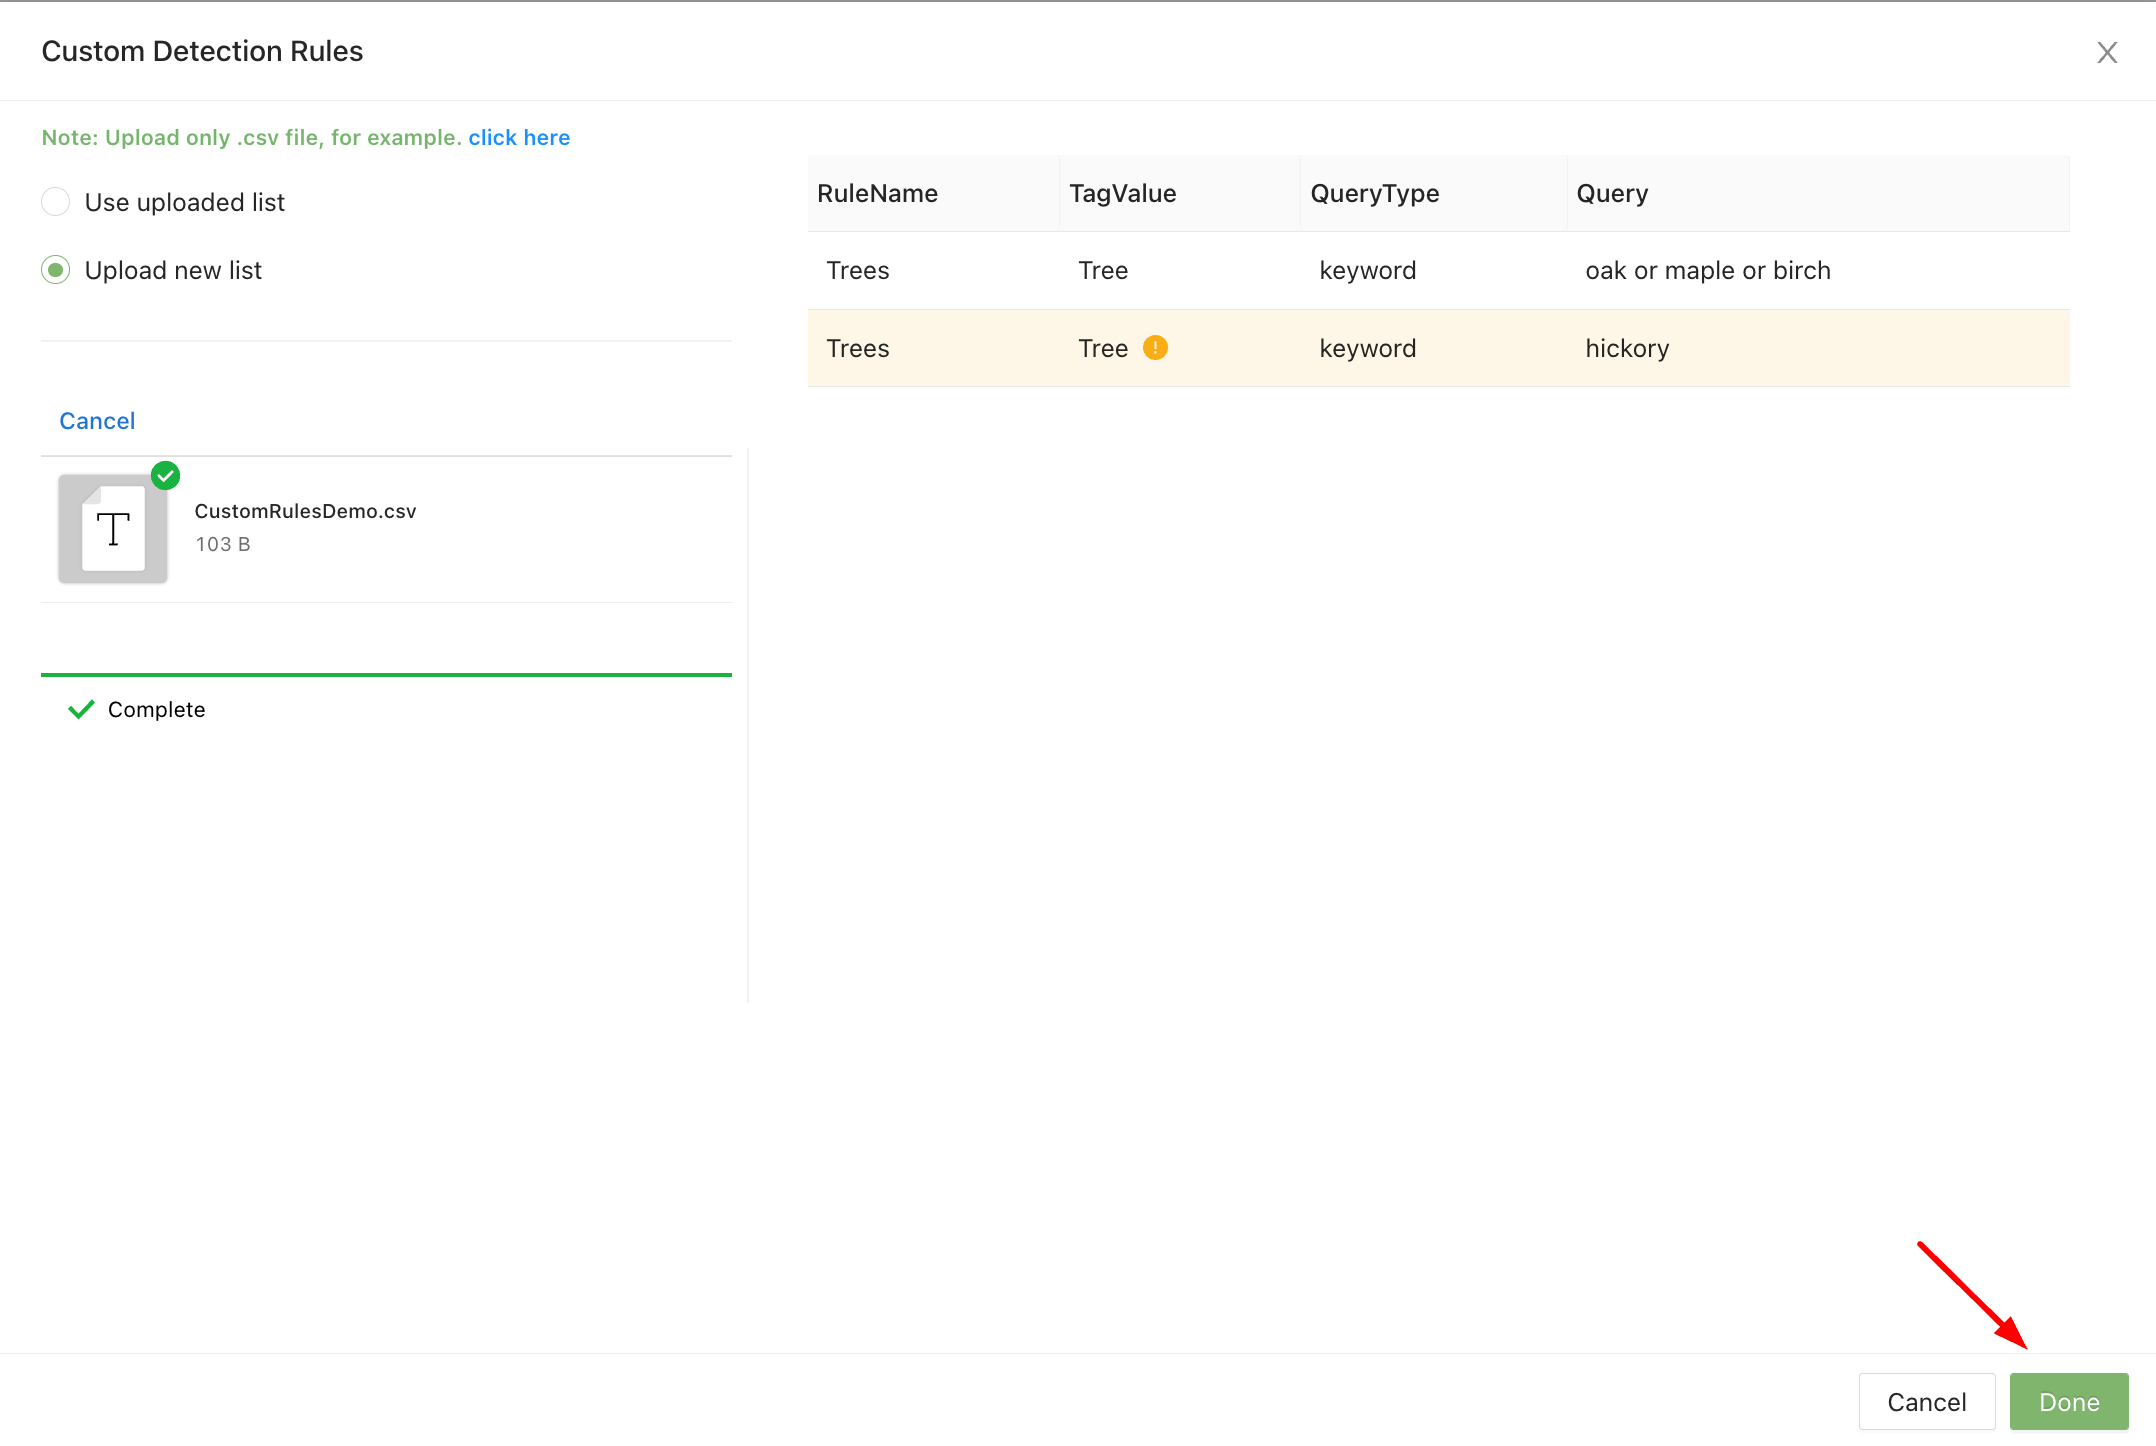
Duplicate custom tag warning message
Unicode characters are now supported when creating Custom Detection Rules.

Example unicode custom detection rules
The document level and project level Activity History will reflect when a users adds an entity via Entity Propagation.

